* Add doxygen and doxygen-awesome css, cleanup docs files
* Ignore more libraries and remove leftover local variables
* Create an actual intro page
* .md files linting
* Add doxygen action
* Fix Doxygen path
* Fix doxyfile path
* Try to upload
* Change docs branch
* Add submudules checkout
* Disable doxygen on PR
* Mention the firmware docs in the readme
* More dev docs mentions in the readme
* Fix runner group, add tags
* Test dev in PR
* Disable running on PR
* Fix a typo in the doxyfile
* Try upload to S3
* Fix local path
* Fix S3 ACL
* Add delete flag, unifying dev and tags
* Update ignored directories
* More ignored directories
* Even more ignored directories
* Fix submodule
* Change S3 uploader
* Change S3 uploader version
* Fix aws sync flags
* Fix ACL
* Disable ACL
* Improve ignores, add WiFi devboard docs
* TEMP: generate dev docs
* TEMP: generate 0.89.0 docs
* Disabling PR trigger
* Enable submodules and test build
* Enable test build
* Disable test build
* Change docs directory structure
* Fix accidentally committed submodule
* Fix submodules
* Update links to the developer documentation
* Markdown linting
* Update workflow, enable test build
* Fix doxygen dir path
* Update Doxyfile-awesome.cfg
* Change paths
* Fix upload docs path
* Disable pull_request debug trigger
* Disable tags building
* Remove autolinks and namespaces
* Establish basic documentation structure
* Add missing changes
* Improve stylesheet, move some files
* Improve examples
* Improve the main page
* Improve application dev docs
* Improve system programming docs
* Improve development tools docs
* Improve other docs
* Improve application examples
* Fix formatting
* Fix PVS-studio warnings
* Improve visuals
* Fix doxygen syntax warnings
* Fix broken links
* Update doxygen action

Co-authored-by: DrunkBatya <drunkbatya.js@gmail.com>
Co-authored-by: あく <alleteam@gmail.com>
Co-authored-by: Georgii Surkov <georgii.surkov@outlook.com>
Co-authored-by: Georgii Surkov <37121527+gsurkov@users.noreply.github.com>
5.7 KiB
Reading logs via the Dev Board
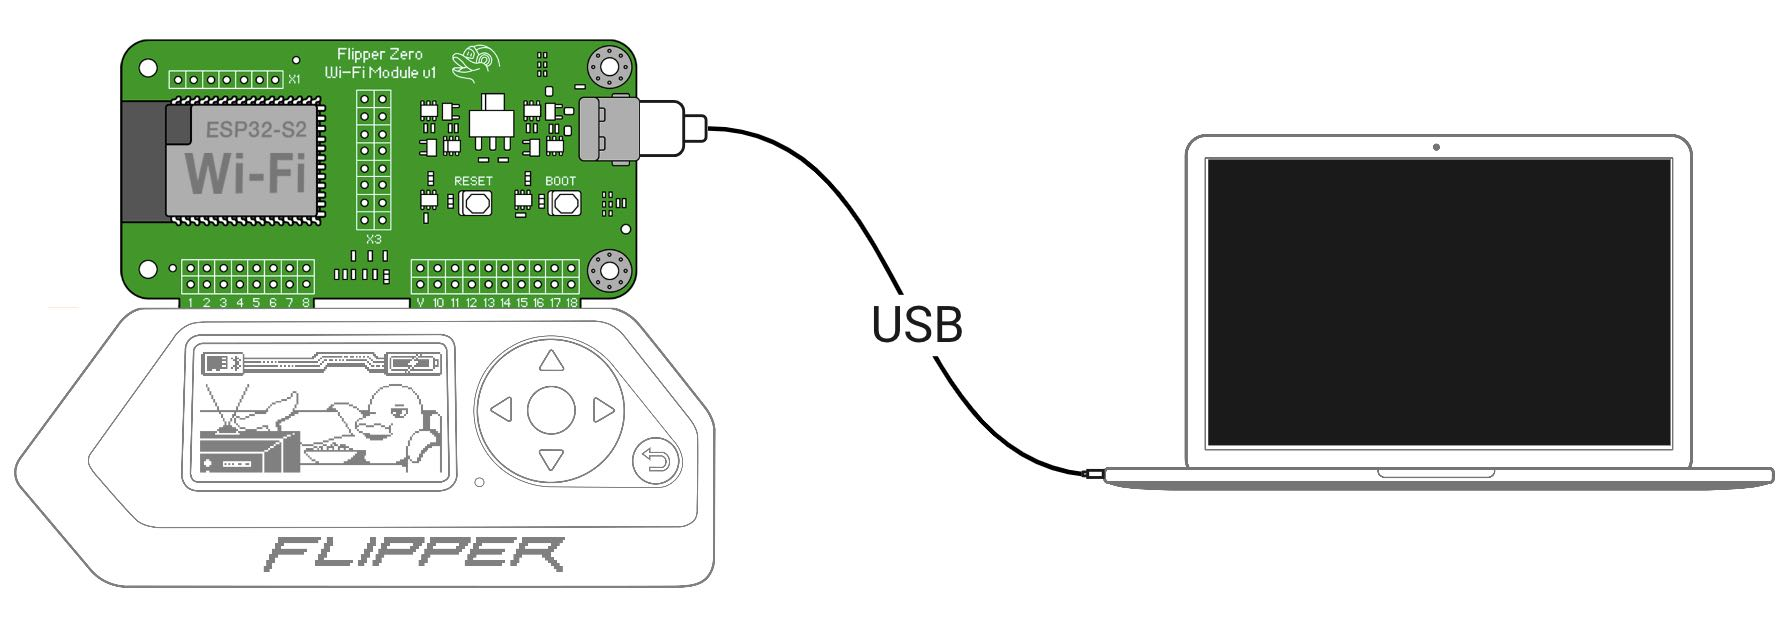
The Developer Board allows you to read Flipper Zero logs via UART. Unlike reading logs via the command-line interface (CLI), the Developer Board enables you to collect logs from the device directly to a serial console independently from the operating system of Flipper Zero. It allows you to see the device's logs when it's loading, updating, or crashing. It's useful for debugging and troubleshooting during software development.
NOTE: Flipper Zero logs can only be viewed when the developer board is connected via USB. The option to view logs over Wi-Fi will be added in future updates.
Setting the log level
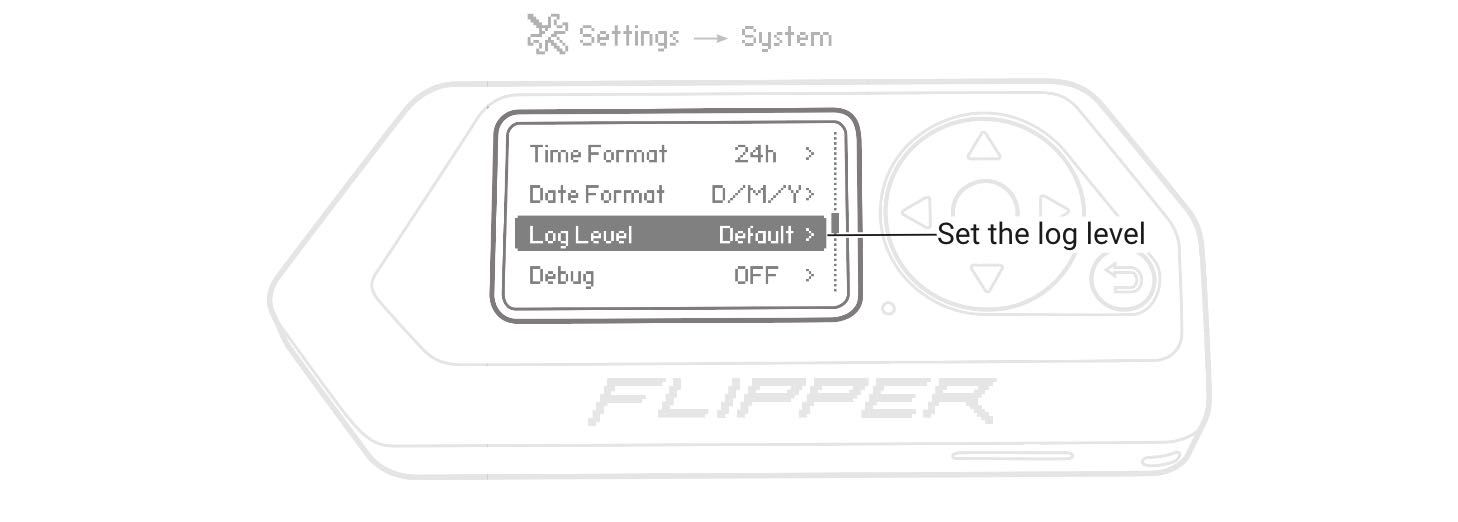
Depending on your needs, you can set the log level by going to Main Menu -> Settings -> Log Level. To learn more about logging levels, visit Settings.
Viewing Flipper Zero logs
Depending on your operating system, you need to install an additional application on your computer to read logs via the Developer Board:
MacOS
On MacOS, you need to install the minicom communication program by doing the following:
-
Install Homebrew by running in the Terminal the following command:
/bin/bash -c "$(curl -fsSL https://raw.githubusercontent.com/Homebrew/install/HEAD/install.sh)" -
After installation of Homebrew, run the following command to install minicom:
brew install minicom
After installation of minicom on your macOS computer, you can connect to the Developer Board to read Flipper Zero logs by doing the following:
-
Cold-plug the Developer Board into your Flipper Zero by turning off the Flipper Zero, connecting the developer board, and then turning it back on.
-
On your computer, open the Terminal and run the following command:
ls /dev/cu.*Note the list of devices.
-
Connect the developer board to your computer using a USB Type-C cable.

-
Rerun the command. Two new devices have to appear: this is the Developer Board.
/dev/cu.usbmodemblackmagic1
/dev/cu.usbmodemblackmagic3
Your Developer Board might have different names.
-
Run the following command:
minicom -D /dev/<port> -b 230400Where
<port>is the name of your device with a bigger number.Example:
minicom -D /dev/cu.usbmodemblackmagic3 -b 230400 -
View logs of your Flipper Zero in the Terminal.
-
To quit, close the minicom window or quit via the minicom menu.
Linux
On Linux, you need to install the minicom communication program. For example, on Ubuntu, run in the Terminal the following command:
sudo apt install minicom
After installation of minicom on your Linux computer, you can connect to the Developer Board to read Flipper Zero logs by doing the following:
-
Cold-plug the Developer Board into your Flipper Zero by turning off the Flipper Zero, connecting the developer board, and then turning it back on.
-
On your computer, open the Terminal and run the following command:
ls /dev/tty*Note the list of devices.
-
Connect the developer board to your computer using a USB Type-C cable.

-
Rerun the command. Two new devices have to appear: this is the Developer Board.
/dev/ttyACM0
/dev/ttyACM1
Your Developer Board might have different names.
-
Run the following command:
minicom -D /dev/<port> \-b 230400Where
<port>is the name of your device with a bigger number.Example:
minicom -D /dev/ttyACM1 \-b 230400 -
View logs of your Flipper Zero in the Terminal.
NOTE: If no logs are shown in the Terminal, try running the command from Step 5 with another device name.
-
To quit, close the minicom window or quit via the minicom menu.
Windows
On Windows, do the following:
-
On your computer, install the PuTTY application.
-
Cold-plug the Developer Board into your Flipper Zero by turning off the Flipper Zero, connecting the developer board, and then turning it back on.
-
Connect the developer board to your computer using a USB Type-C cable.

-
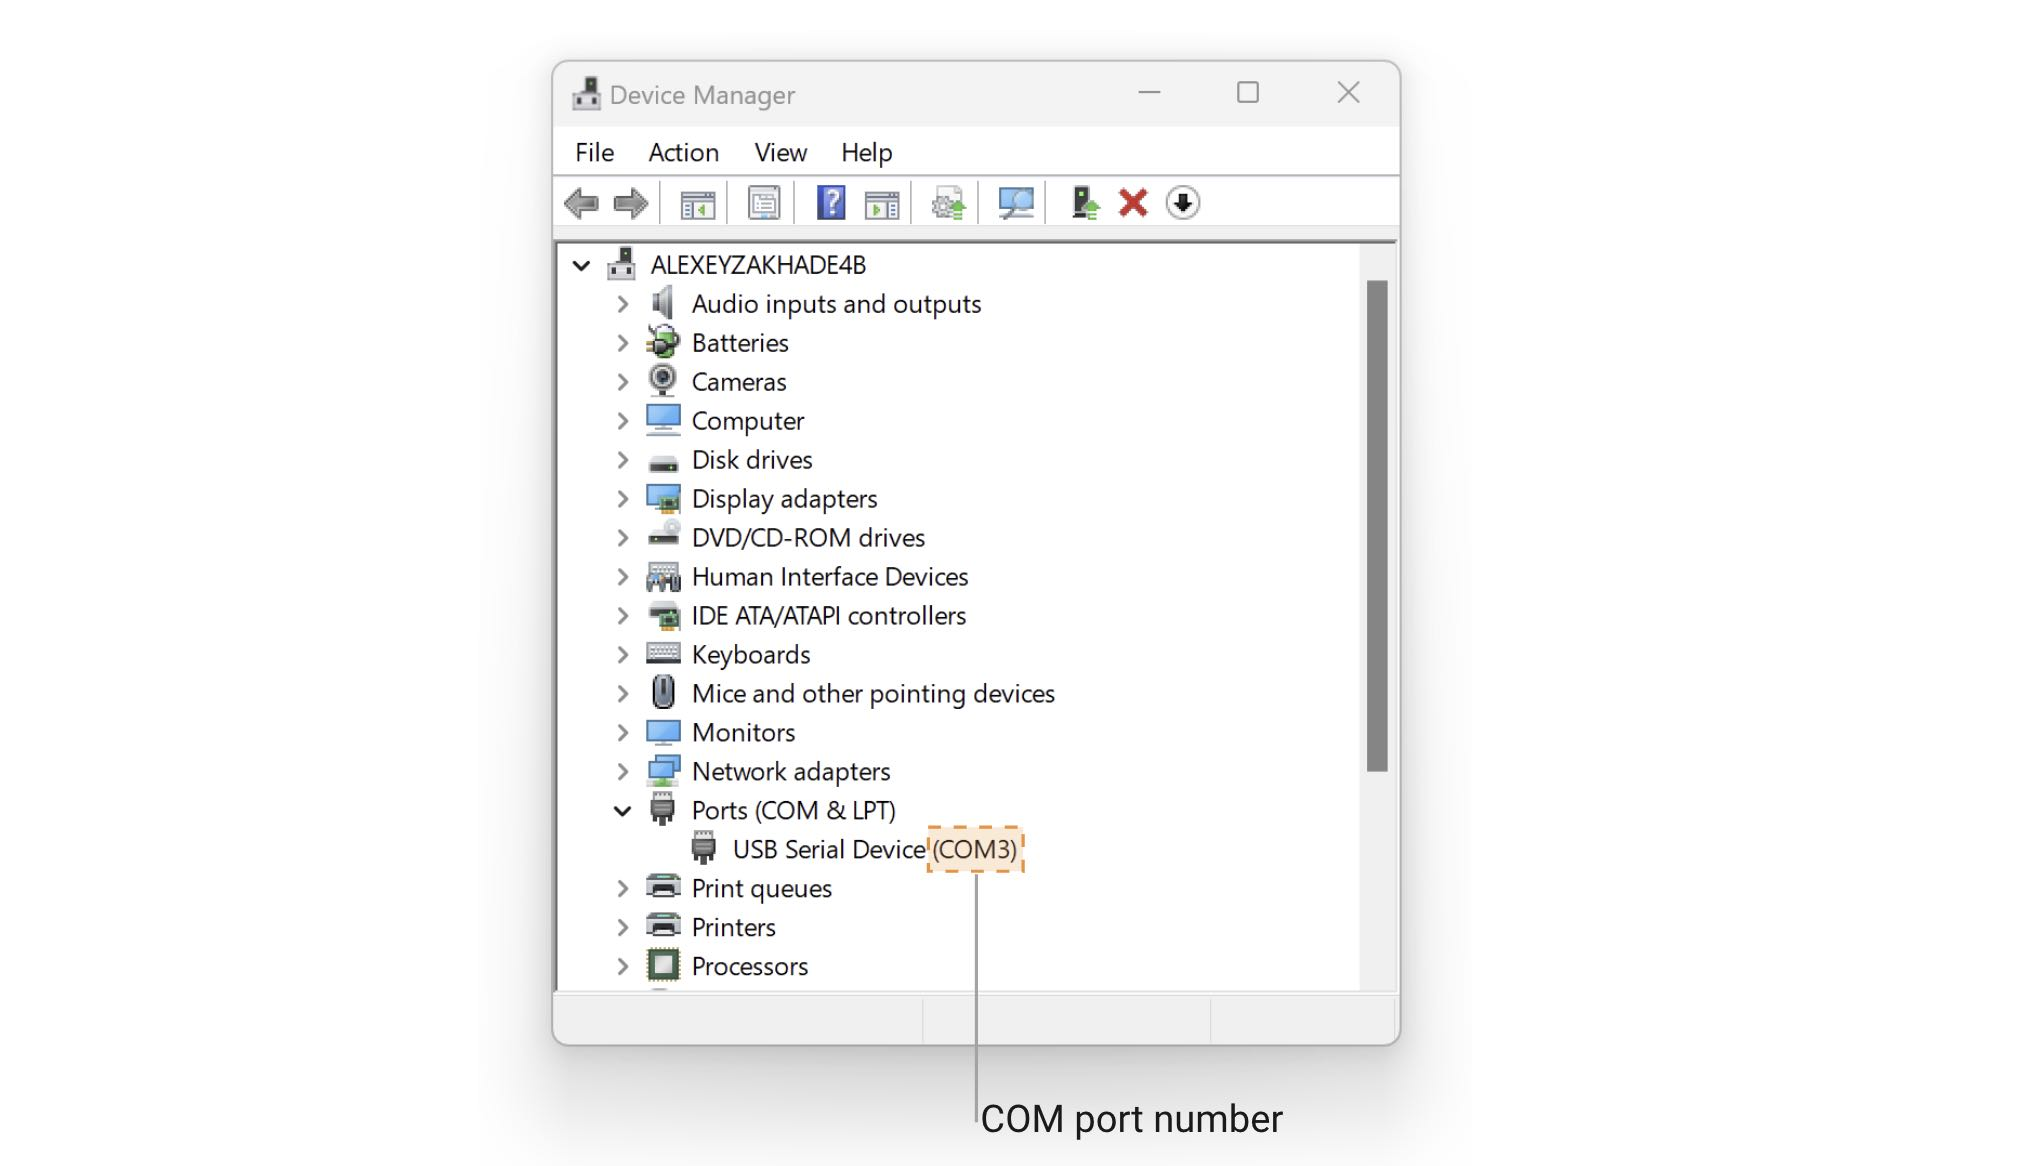
Find the serial port that the developer board is connected to by going to Device Manager -> Ports (COM & LPT) and looking for a new port that appears when you connect the Wi-Fi developer board.

-
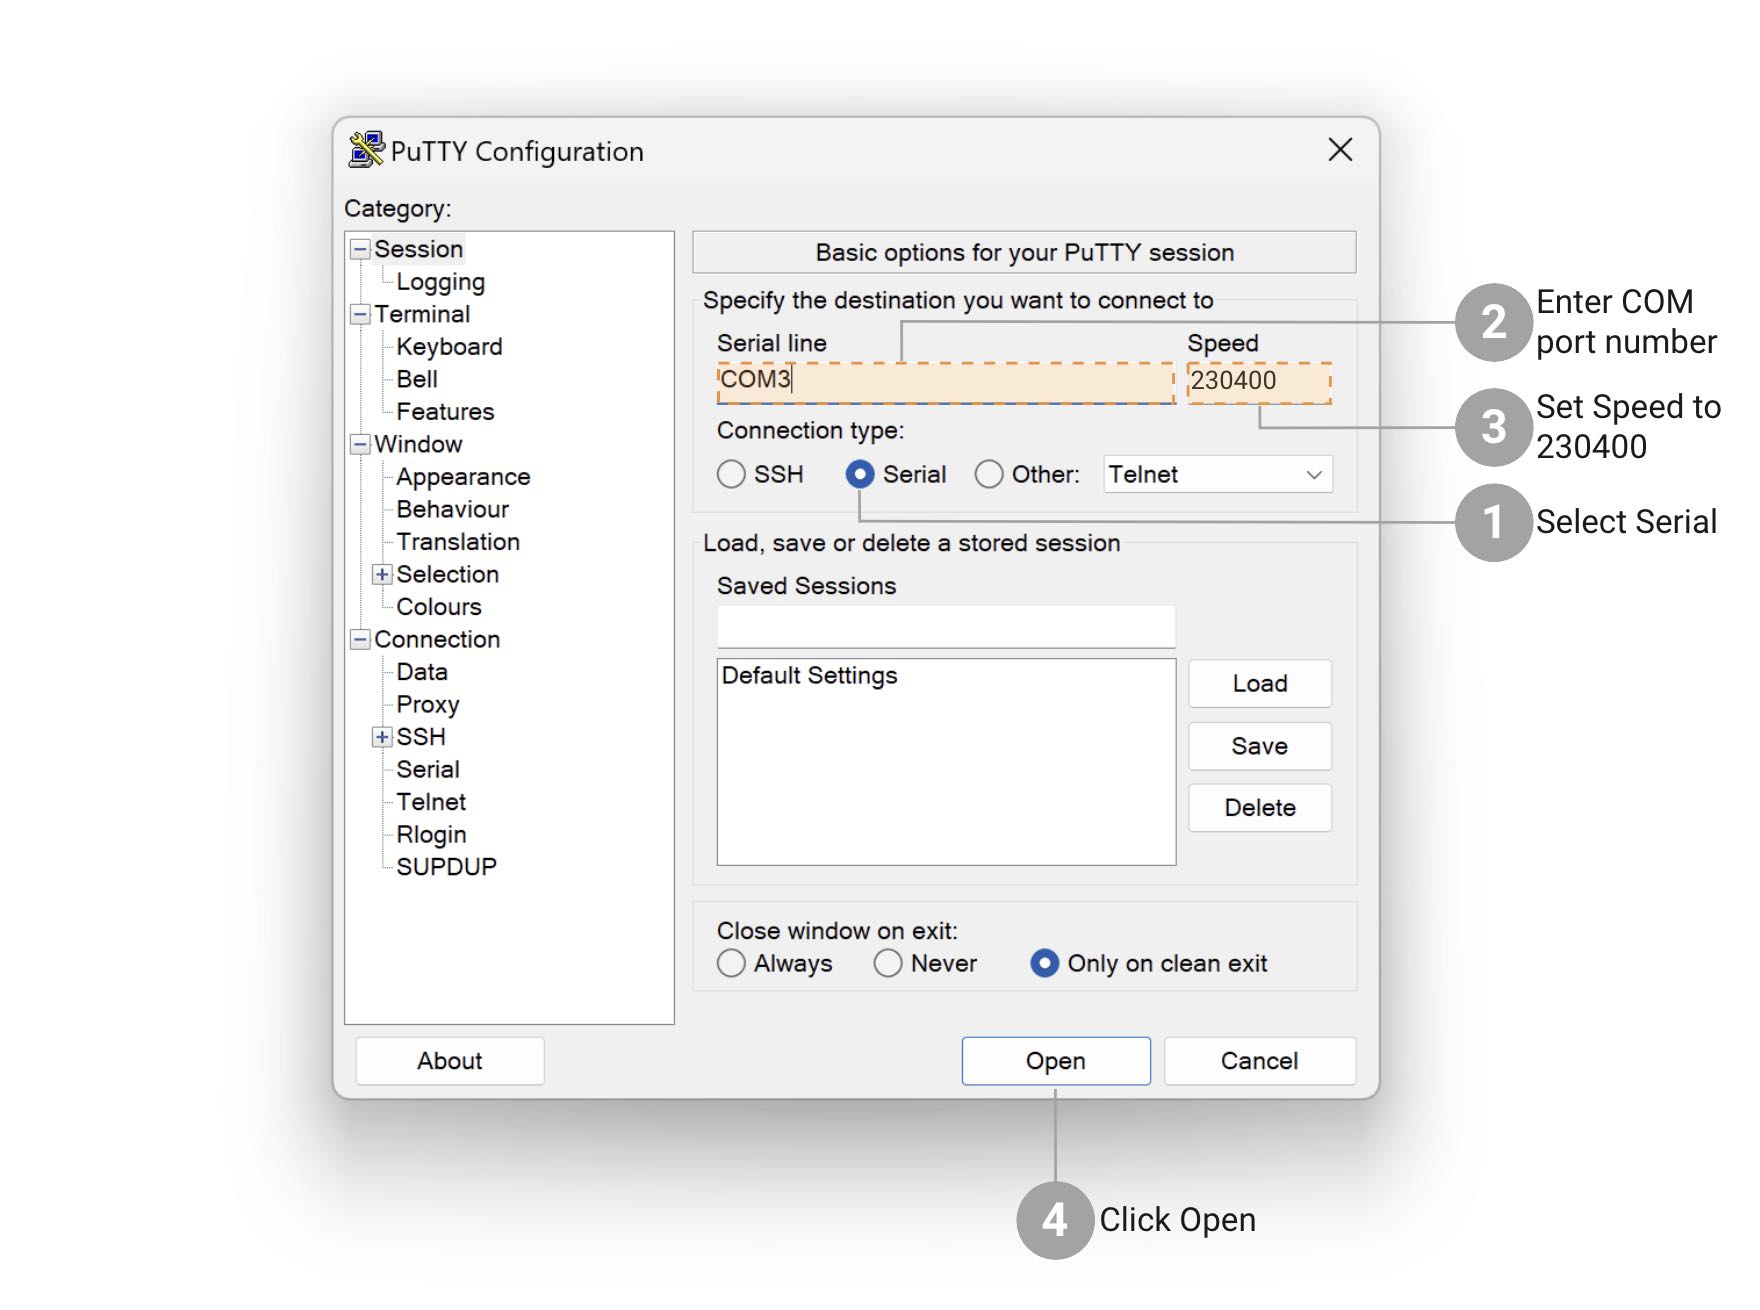
Run the PuTTY application and select Serial as the connection type.
-
Enter the port number you found in the previous step into the Serial line field.
-
View logs of your Flipper Zero in the PuTTY terminal window.
-
To quit, close the PuTTY window.

