8.4 KiB
AVD - Android Virtual Device
Thank you very much to @offsecjay for his help while creating this content.
What is
Android Studio allows to** run virtual machines of Android that you can use to test APKs**. In order to use them you will need:
- The Android SDK tools - Download here.
- Or Android Studio (with Android SDK tools) - Download here.
In Windows (in my case) after installing Android Studio I had the SDK Tools installed in: C:\Users\<UserName>\AppData\Local\Android\Sdk\tools
JDK
For MacOS machines I recommend you to install the following version to be able to use the CLI commands mentioned in the following sections:
brew install openjdk@8
GUI
Prepare Virtual Machine
If you installed Android Studio, you can just open the main project view and access: **Tools **--> AVD Manager.
Then, click on Create Virtual Device, **select **the phone you want to use and click on Next.
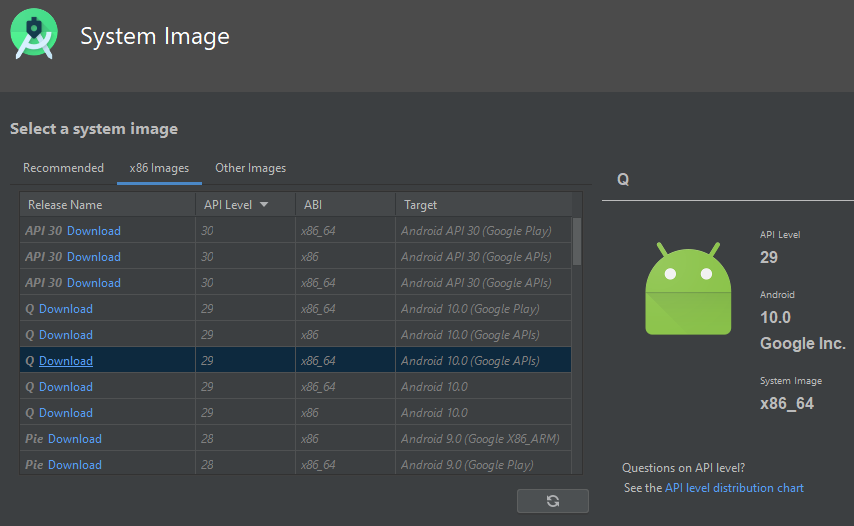
_****_In the current view you are going to be able to select and download the Android image that the phone is going to run:
So, select it and click on **Download ****(**now wait until the image is downloaded).
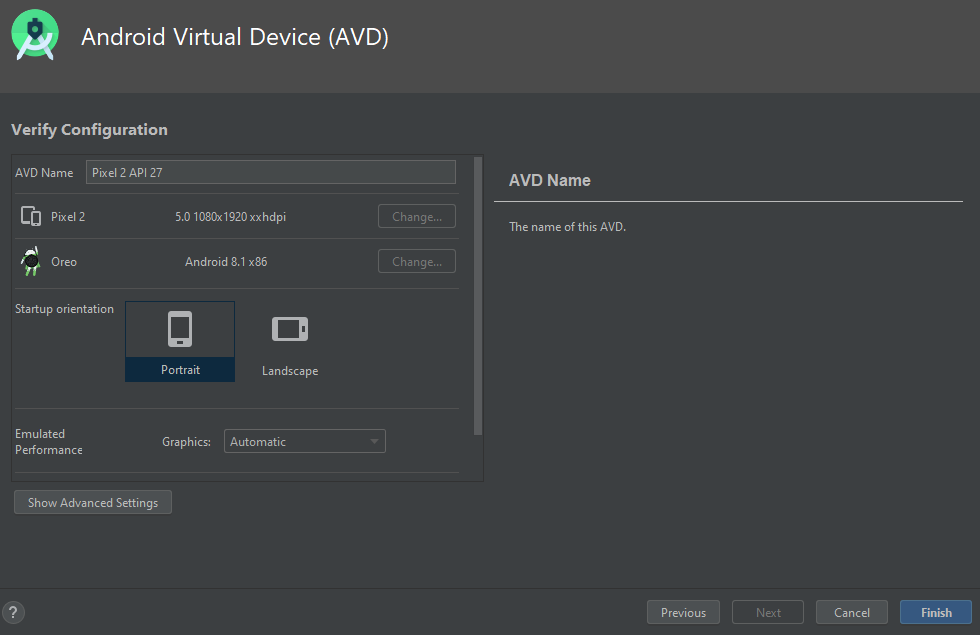
Once the image is downloaded, just select _**Next **_and Finish.
The virtual machine will be created. Now** every time that you access AVD manager it will be present**.
Run Virtual Machine
In order to **run **it just press the Start button.
Command Line tool
Prepare Virtual Machine
{% hint style="info" %}
In MacOS systems the executable is located in /Users/<username>/Library/Android/sdk/tools/bin
{% endhint %}
First of all you need to decide which phone you want to use, in order to see the list of possible phones execute:
C:\Users\<UserName>\AppData\Local\Android\Sdk\tools\bin\avdmanager.bat list device

id: 0 or "tv_1080p"
    Name: Android TV (1080p)
    OEM : Google
    Tag : android-tv
---------
id: 1 or "tv_720p"
    Name: Android TV (720p)
    OEM : Google
    Tag : android-tv
---------
id: 2 or "wear_round"
    Name: Android Wear Round
    OEM : Google
    Tag : android-wear
---------
id: 3 or "wear_round_chin_320_290"
    Name: Android Wear Round Chin
    OEM : Google
    Tag : android-wear
---------
id: 4 or "wear_square"
    Name: Android Wear Square
    OEM : Google
    Tag : android-wear
---------
id: 5 or "Galaxy Nexus"
    Name: Galaxy Nexus
    OEM : Google
---------
id: 6 or "Nexus 10"
    Name: Nexus 10
    OEM : Google
---------
id: 7 or "Nexus 4"
    Name: Nexus 4
    OEM : Google
---------
id: 8 or "Nexus 5"
    Name: Nexus 5
    OEM : Google
---------
id: 9 or "Nexus 5X"
    Name: Nexus 5X
    OEM : Google
Once you have decide the name of the device you want to use, you need to decide which Android image you want to run in this device.
****You can list all the options using sdkmanager:
C:\Users\<UserName>\AppData\Local\Android\Sdk\tools\bin\sdkmanager.bat --list
And **download **the one (or all) you want to use with:
C:\Users\<UserName>\AppData\Local\Android\Sdk\tools\bin\sdkmanager.bat "platforms;android-28" "system-images;android-28;google_apis;x86_64"
Once you have downloaded the Android image you want to use you can list all the downloaded Android images with:
C:\Users\<UserName>\AppData\Local\Android\Sdk\tools\bin\avdmanager.bat list target
----------
id: 1 or "android-28"
     Name: Android API 28
     Type: Platform
     API level: 28
     Revision: 6
----------
id: 2 or "android-29"
     Name: Android API 29
     Type: Platform
     API level: 29
     Revision: 4
At this moment you have decided the device you want to use and you have downloaded the Android image, so you can create the virtual machine using:
C:\Users\<UserName>\AppData\Local\Android\Sdk\tools\bin\avdmanager.bat -v create avd -k "system-images;android-28;google_apis;x86_64" -n "AVD9" -d "Nexus 5X"
In the last command **I created a VM named **"AVD9" using the device "Nexus 5X" and the Android image "system-images;android-28;google_apis;x86_64".
Now you can list the virtual machines you have created with:
C:\Users\<UserName>\AppData\Local\Android\Sdk\tools\bin\avdmanager.bat list avd

 Name: AVD9
  Device: Nexus 5X (Google)
    Path: C:\Users\cpolo\.android\avd\AVD9.avd
  Target: Google APIs (Google Inc.)
          Based on: Android API 28 Tag/ABI: google_apis/x86_64

The following Android Virtual Devices could not be loaded:
    Name: Pixel_2_API_27
    Path: C:\Users\cpolo\.android\avd\Pixel_2_API_27_1.avd
   Error: Google pixel_2 no longer exists as a device
Run Virtual Machine
We have already seen how you can list the created virtual machines, but** you can also list them using**:
C:\Users\<UserName>\AppData\Local\Android\Sdk\tools\emulator.exe -list-avds
AVD9
Pixel_2_API_27
You can simply run any virtual machine created using:
C:\Users\<UserName>\AppData\Local\Android\Sdk\tools\emulator.exe -avd "VirtualMachineName"
C:\Users\<UserName>\AppData\Local\Android\Sdk\tools\emulator.exe -avd "AVD9"
Or using more advance options you can run a virtual machine like:
C:\Users\<UserName>\AppData\Local\Android\Sdk\tools\emulator.exe -avd "AVD9" -http-proxy 192.168.1.12:8080 -writable-system
Command line options
However there are a lot of different command line useful options that you can use to initiate a virtual machine. Below you can find some interesting options but can** **find a complete list here
Boot
-snapshot name: Start VM snapshot-snapshot-list -snapstorage ~/.android/avd/Nexus_5X_API_23.avd/snapshots-test.img: List all the snapshots recorded
Network
-dns-server 192.0.2.0, 192.0.2.255: Allow to indicate comma separated the DNS servers to the VM.-http-proxy 192.168.1.12:8080: Allow to indicate an HTTP proxy to use (very useful to capture the traffic using Burp)-port 5556: Set the TCP port number that's used for the console and adb.-ports 5556,5559: Set the TCP ports used for the console and adb.-tcpdump /path/dumpfile.cap: Capture all the traffic in a file
System
-selinux {disabled|permissive}: Set the Security-Enhanced Linux security module to either disabled or permissive mode on a Linux operating system.-timezone Europe/Paris: Set the timezone for the virtual device-screen {touch(default)|multi-touch|o-touch}: Set emulated touch screen mode.-writable-system: Use this option to have a writable system image during your emulation session. You will need also to runadb root; adb remount. This is very useful to install a new certificate in the system.
Install Burp certificate on a Virtual Machine
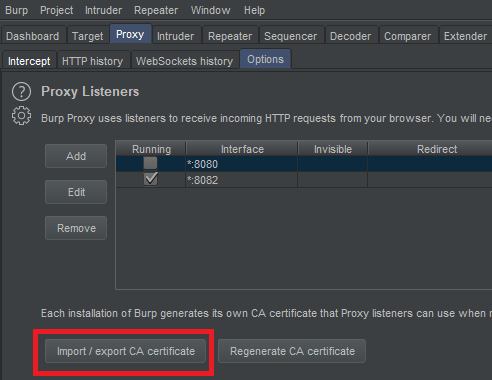
First of all you need to download the Der certificate from Burp. You can do this in **Proxy **--> **Options **--> Import / Export CA certificate
Export the certificate in Der format and lets **transform **it to a form that **Android **is going to be able to **understand. **Note that in order to configure the burp certificate on the Android machine in AVD you need to **run **this machine with the -writable-system option.
For example you can run it like:
C:\Users\<UserName>\AppData\Local\Android\Sdk\tools\emulator.exe -avd "AVD9" -http-proxy 192.168.1.12:8080 -writable-system
Then, to configure burps certificate do:
openssl x509 -inform DER -in burp_cacert.der -out burp_cacert.pem
CERTHASHNAME="`openssl x509 -inform PEM -subject_hash_old -in burp_cacert.pem | head -1`.0"
mv burp_cacert.pem $CERTHASHNAME #Correct name
adb root && adb remount #Allow to write on /syste
adb push $CERTHASHNAME /sdcard/ #Upload certificate
adb shell mv /sdcard/$CERTHASHNAME /system/etc/security/cacerts/ #Move to correct location
adb shell chmod 644 /system/etc/security/cacerts/$CERTHASHNAME #Assign privileges
adb reboot #Now, reboot the machine
Once the machine finish rebooting the burp certificate will be in use by it!
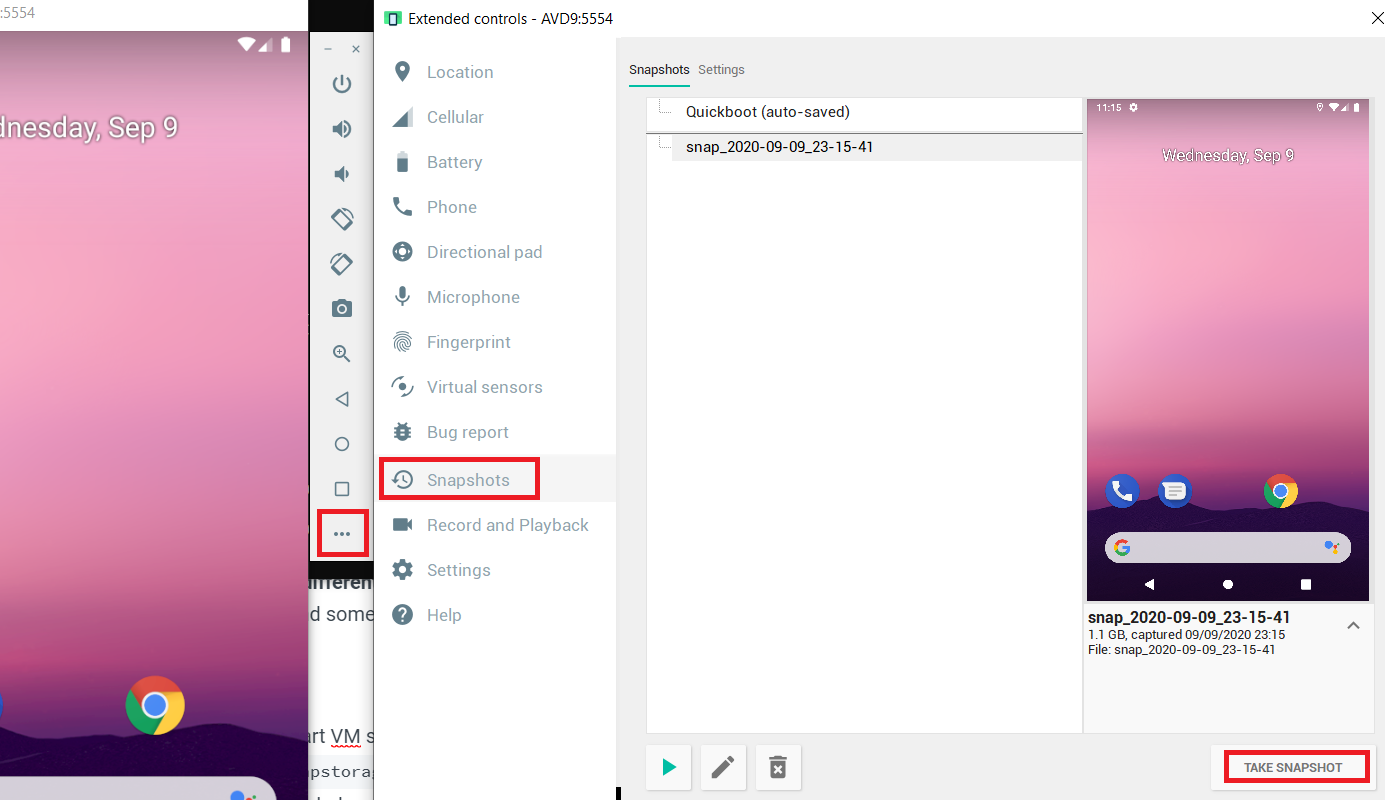
Take a Snapshot
You can use the GUI to take a snapshot of the VM at any time:


