| group_vars | ||
| roles/install_common | ||
| install_kasm.yml | ||
| inventory | ||
| README.md | ||
Ansible
Installing Ansible
This project requires ansible 2.9.24 or greater on the host running the ansible playbook. The target systems do no not need Ansible installed.
The steps below for installing Ansible have been tested on CentOS 7.9.2009, CentOS 8.4.2105, Debian 9.13, Debian 10.10, Ubuntu 18.04.5, and Ubuntu 20.04.3.
-
Ensure pip3 is installed
Ubuntu/Debian:
sudo apt install python3-pipCentOS:
sudo yum install python3-pip -
Add local bin directory to path in bashrc
echo 'PATH=$PATH:$HOME/.local/bin' >> ~/.bashrc source ~/.bashrc -
Use pip to install ansible
python3 -m pip install --user -U pip && python3 -m pip install --user -U ansible -
Ensure that ansible version is greater than 2.9.24
ansible --version
Kasm Multi Server install
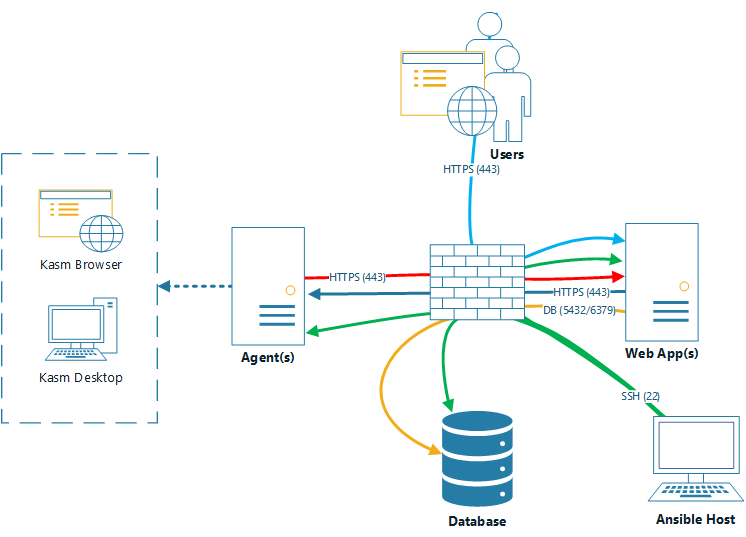
This project will deploy Kasm Workspaces in a multi-server deployment using Ansible.
- It installs the kasm components on the systems specified in the ansible
inventoryrequired for the respective roles (db, web, agent). - It creates a new swapfile to ensure that the total swap space matches the size
desired_swap_sizespecified on the files in group_vars/. - It enables the docker daemon to run at boot to ensure that kasm services are started after a reboot.
It has been tested on CentOS 7.9.2009, CentOS 8.4.2105, Debian 9.13, Debian 10.10, Ubuntu 18.04.5, and Ubuntu 20.04.3
Ansible Configuration
-
Open
roles/install_common/vars/main.yml,group_vars/agent.ymland update variables if desired. -
Open
inventoryfile and fill in the hostnames / ips for the servers that will be fulfilling the agent, webapp and db roles. -
Run the deployment.
ansible-playbook -Kk -u [username] -i inventory install_kasm.ymlAnsible will prompt you for the ssh password and sudo password (will almost always be the same password).
Or, if you have ssh keys copied over to your servers and have NOPASSWD in sudoers you can just run.
ansible-playbook -u [username] -i inventory install_kasm.yml -
Login to the deployment as admin@kasm.local using the IP of one of the WebApp servers (eg https://192.168.1.2)
-
Navigate to the Agents tab, and enable each Agent after it checks in. (May take a few minutes)
